

Generate with AI
Create feedback forms using AI prompts—describe what you need, preview, edit, and publish
Generate with AI lets you create feedback forms from plain-language descriptions. Describe what feedback you want to collect, and encatch uses AI to draft a form with questions, sections, and question types tailored to your goals. You keep full control: preview the result in real time, refine it with a Notion-style editor or AI chat, and publish when ready.
There are two ways to generate a form with AI: use the built-in Encatch AI on the Design your form page, or let your own AI assistant (Claude, ChatGPT, or Cursor) build it through the Encatch MCP Server.
AI Credits
Encatch AI uses AI credits to generate forms. Credits consumed are shown in the chat input bar (for example, 1 credit used) so you can track your usage. Forms built through the MCP Server use your own AI assistant's account.
AI-powered form generation
| Option | Where you work | Description |
|---|---|---|
| Encatch AI | Design your form page in encatch | Built-in assistant. Chat directly in encatch, switch between Ask and Build modes, and apply changes with live preview. Uses encatch AI credits. |
| Your AI assistant (MCP) | Claude, ChatGPT, or Cursor | Connect the Encatch MCP Server and describe the form in your assistant. It builds a working copy you can preview in the browser, then you transfer or publish it from encatch. |
This page walks through Encatch AI. For the assistant route, see Build forms from your AI assistant below.
Why Use Generate with AI?
- Two ways in — Use the built-in Encatch AI, or build from Claude, ChatGPT, or Cursor through the Encatch MCP Server.
- Faster start — Skip the blank canvas. Describe your intent in a few sentences and get a structured form in seconds.
- Smart question types — AI suggests appropriate input types (Rating, NPS, Short Answer, Multiple Choice, and more) based on your description.
- Logical flow — Questions are organized into pages with welcome and thank-you screens where appropriate.
- Live preview — See the form update on the right as AI builds it or as you edit manually.
- Notion-style rich text editor — Switch to Manual edit for block-based editing with rich text formatting alongside AI chat.
- Edit before launch — Open the Form Builder to fine-tune questions, appearance, targeting, and triggers before publishing.
Workflow Overview
Generating a feedback form with AI follows four main steps:
- Start — Open Forms, click New Form, then choose Encatch AI under Other ways to create
- Prompt & Generate — Describe your form on the Design your form page; AI drafts sections and questions
- Refine — Use AI assist, Manual edit, and the live preview to adjust the draft
- Publish — Click Proceed to draft, then Publish in the Form Builder
Step 1: Open Encatch AI
Open Forms, click New Form, then choose Encatch AI under Other ways to create.
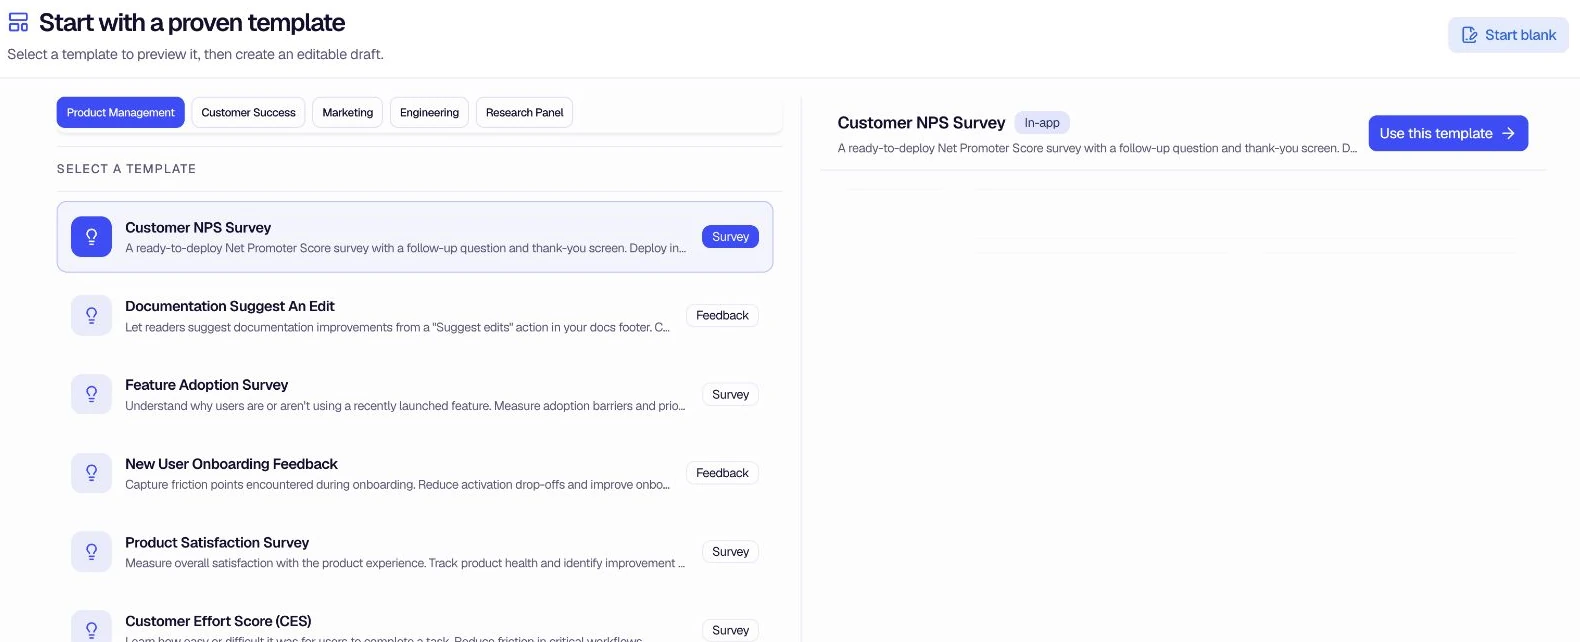
This opens the Design your form page—a split view with your build workspace on the left and a Live preview on the right.
Step 2: Prompt & Generate
On the Design your form page, describe the questionnaire you want in the input at the bottom. The conversation appears on the left while the form preview updates on the right.
Example prompts:
- "Create a customer satisfaction feedback form with rating questions, NPS score, and open-ended feedback across multiple sections."
- "Build a product feedback form with questions about features, usability, and improvement suggestions organized into different sections."
- "Design an employee engagement feedback form with multiple choice questions and rating scales spread across several sections."
When you send a prompt, AI drafts the form structure. A status such as Form updated confirms the result, and the Live preview panel updates to show the welcome screen, pages, and questions.
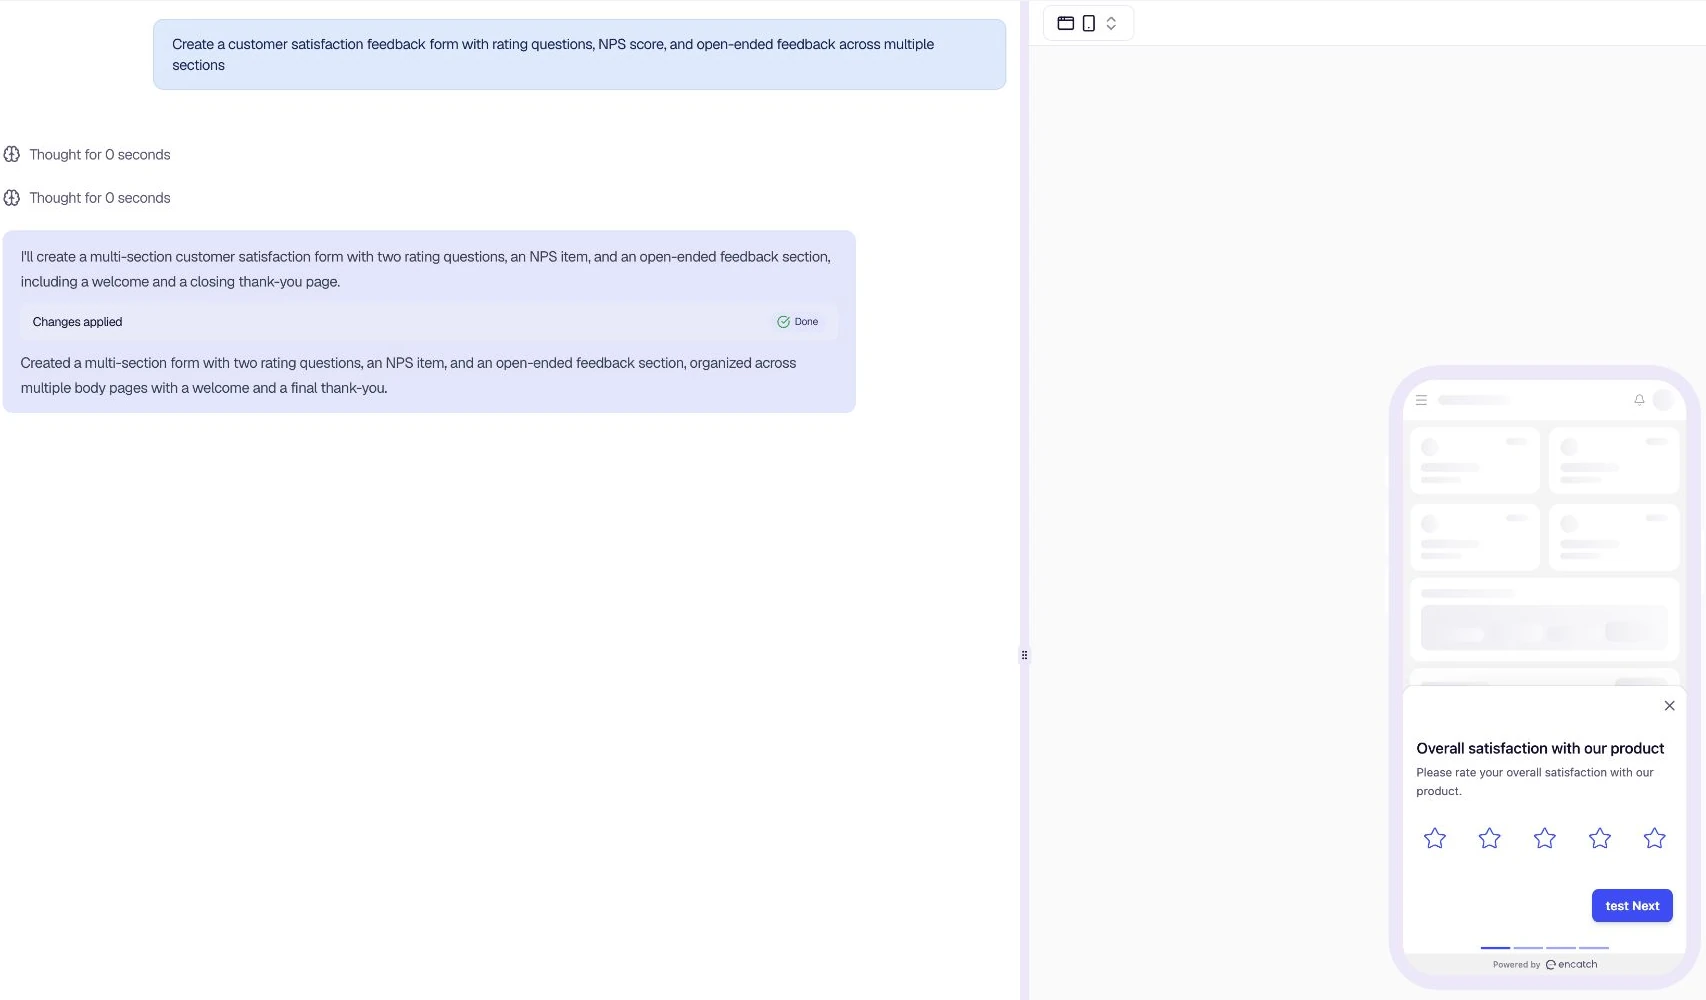
Use Build to generate or update the form directly, or Ask to plan before clicking Build form. Credits used appear in the input bar.
Keep chatting to add sections, change question types, or adjust wording. Messages are saved in your browser storage for the current session.
Build forms from your AI assistant (MCP)
If you already work in Claude, ChatGPT, or Cursor, you can build the form there instead of on the Design your form page.
- Connect — Add the Encatch MCP Server to your assistant and sign in with your encatch account. No API key is needed.
- Describe — Tell the assistant what feedback you want to collect. It builds a working copy: pages, questions, styling, and conditional logic.
- Preview — Open the preview link the assistant gives you to see the form in your browser, and ask for changes in the same conversation.
- Transfer or publish — As the working-copy owner, sign in on the preview page and use Next Actions. The assistant can't publish for you; publishing stays in your hands.
Working copies are separate from your live forms until you transfer or publish them. See AI Assistant / MCP Server for setup steps for each assistant.
Step 3: Refine your form
Live preview
The Live preview panel on the right updates as you build with AI assist or Manual edit. Use it to check layout, wording, and flow before opening the Form Builder. Switch device and theme controls in the preview toolbar to see how the form looks on mobile and in light or dark mode.
Manual edit: Notion-style rich text editor
Switch to the Manual edit tab to refine your form in a Notion-style block editor with enhanced content creation and formatting.
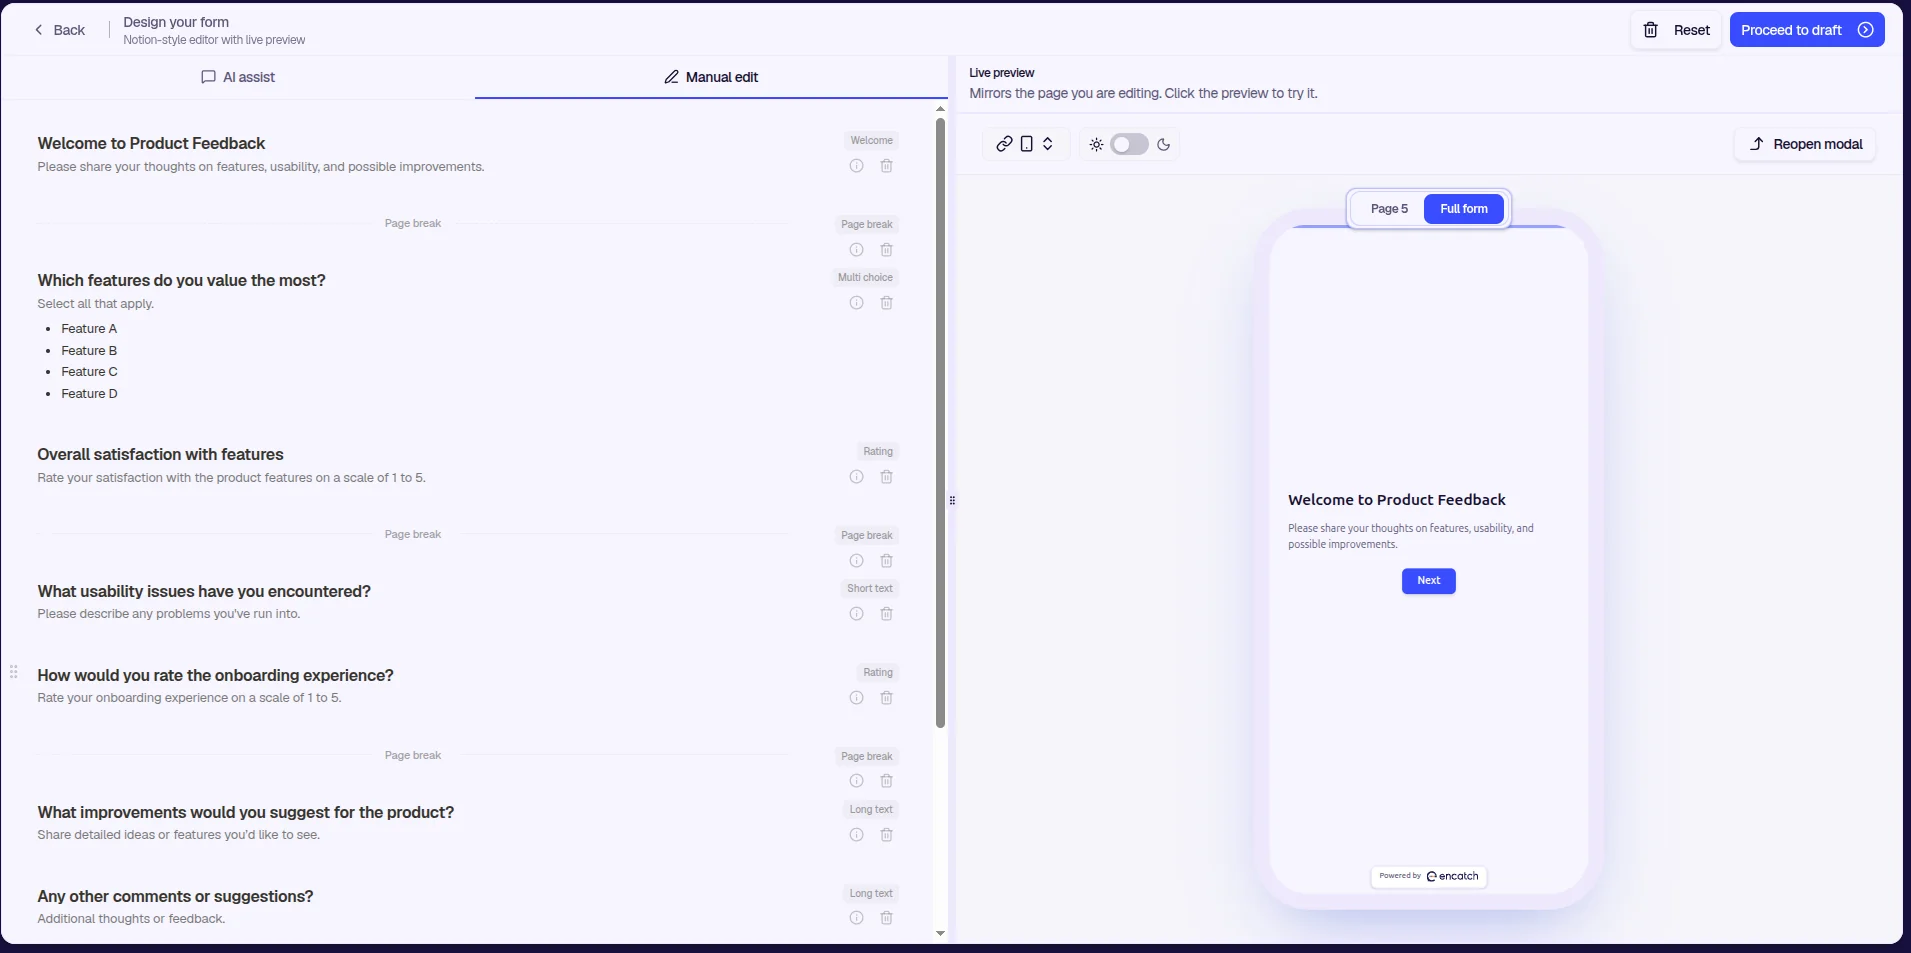
- Block-based editing — Each question type is a block you can add, reorder, and edit inline.
- Slash commands — Type
/to open the block palette and insert question types (Rating, NPS, Single Choice, Welcome screen, page breaks, and more). - Rich text formatting — Select text in question descriptions to apply bold, italic, and links.
- Drag and drop — Reorder blocks by dragging.
- Seamless switching — Move between AI assist and Manual edit; your form content stays in sync.
Proceed to draft
When the draft looks right, click Proceed to draft in the header. This opens the Form Builder with your generated form loaded and ready to customize.
Step 4: Customize & Publish
In the Form Builder, you can adjust every detail before going live:
- Edit questions — Click the pencil icon next to any question to change text, answer type, or settings.
- Reorder — Use the drag handle to move questions within or between pages.
- Add or remove — Use + Add question to add fields; use the trash icon to delete questions or pages.
- Configure screens — Edit the Welcome screen, Endings (thank-you screen), and other form elements.
- Tabs — Use Form, Appearance, and Logic jumps (plus Targeting, Triggers, and Advanced from the bottom bar) to configure behavior.
The Form Builder includes a real-time device preview. Use Save now to save progress without publishing.
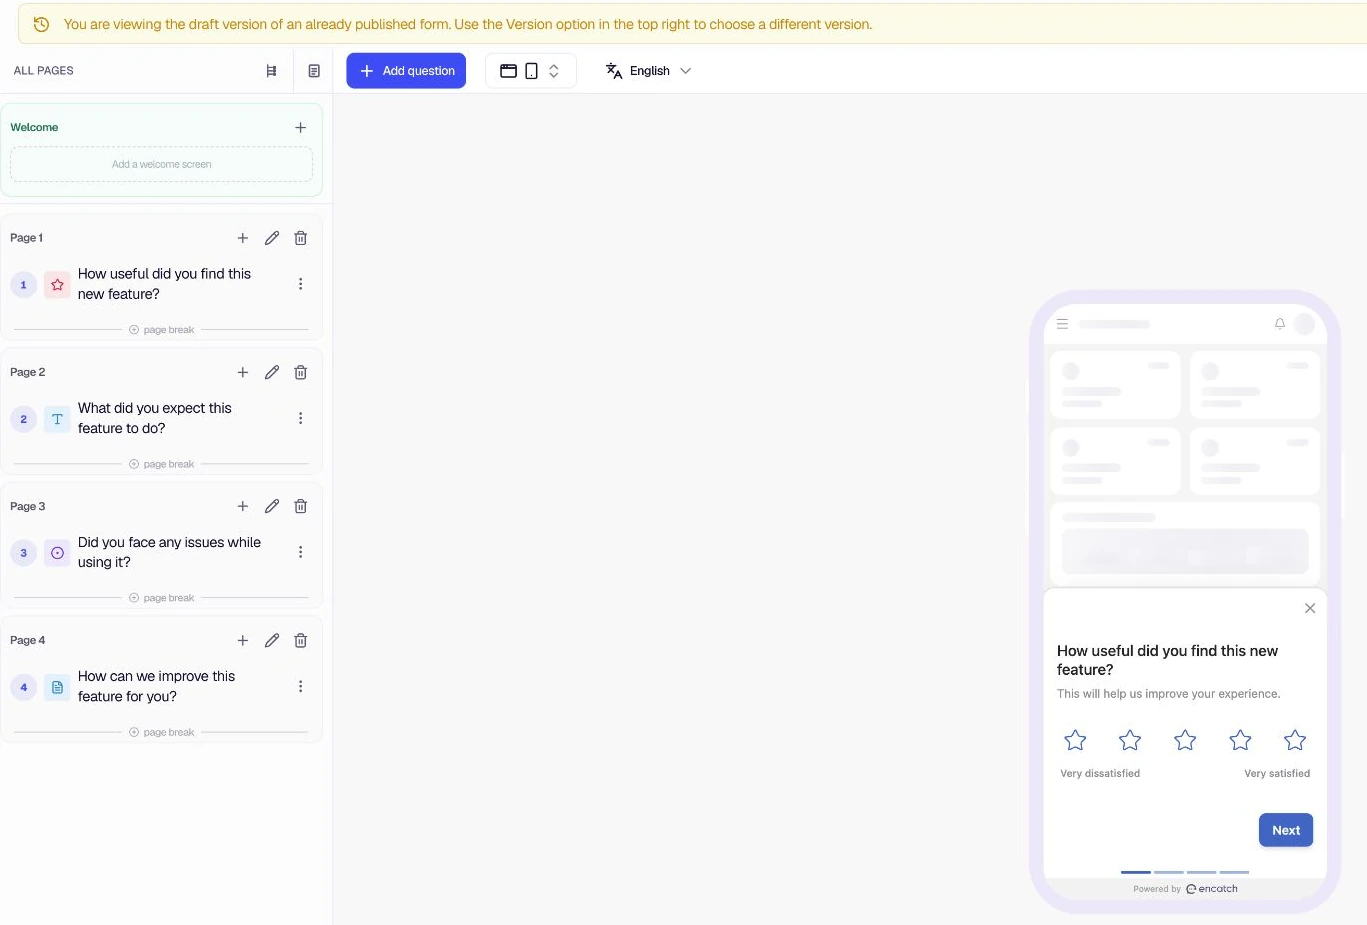
When the form meets your needs, click Publish to make it live. Before publishing, ensure:
- Questions and wording are correct
- Welcome and thank-you screens are configured if needed
- Targeting and triggers are set as desired (if applicable)
- You've previewed the form on the target device
After publishing, the feedback form is active and collects responses according to your configuration.
Best Practices
- Be specific — The more detail you provide in your prompt, the better AI can match question types and structure to your goals.
- Iterate in chat — Ask for additional sections, different question types, or wording changes before moving to the Form Builder.
- Use Manual edit for polish — Switch to Manual edit for fine-grained block edits, page breaks, and rich text formatting.
- Always preview — Check the live preview and Form Builder device preview before publishing.
- Use your own AI assistant — Build through the Encatch MCP Server from Claude, ChatGPT, or Cursor to use your assistant's account instead of encatch AI credits.
- Use AI credits wisely — Encatch AI generations use credits; review your account usage if you generate frequently.
Summary
| Step | Action |
|---|---|
| Start | Forms → New Form → Encatch AI |
| Prompt & Generate | Describe your form on Design your form (AI assist tab); credits shown in the input bar |
| Refine | Use live preview, Manual edit, or continue chatting with AI |
| Proceed to draft | Opens the Form Builder with your generated form |
| Publish | Click Publish in the Form Builder to make the form live |
Generate with AI is ideal for quick starts, exploratory feedback, or when you want AI to suggest structure and question types. For more on customizing forms after draft, see Customize Feedback Form.
Was this page helpful?